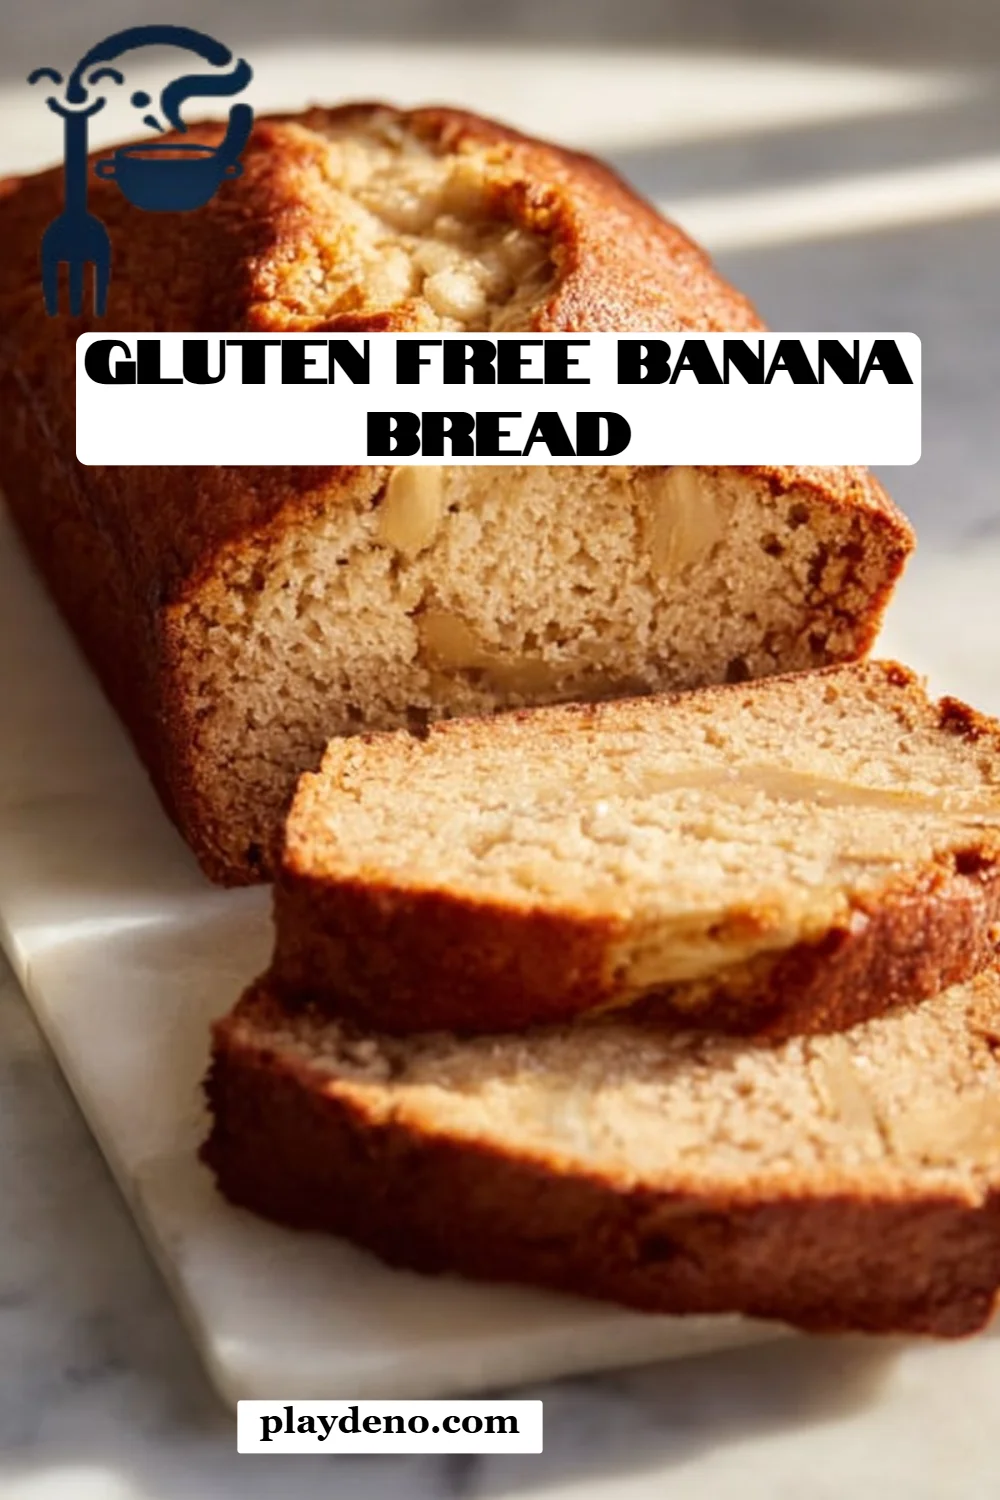
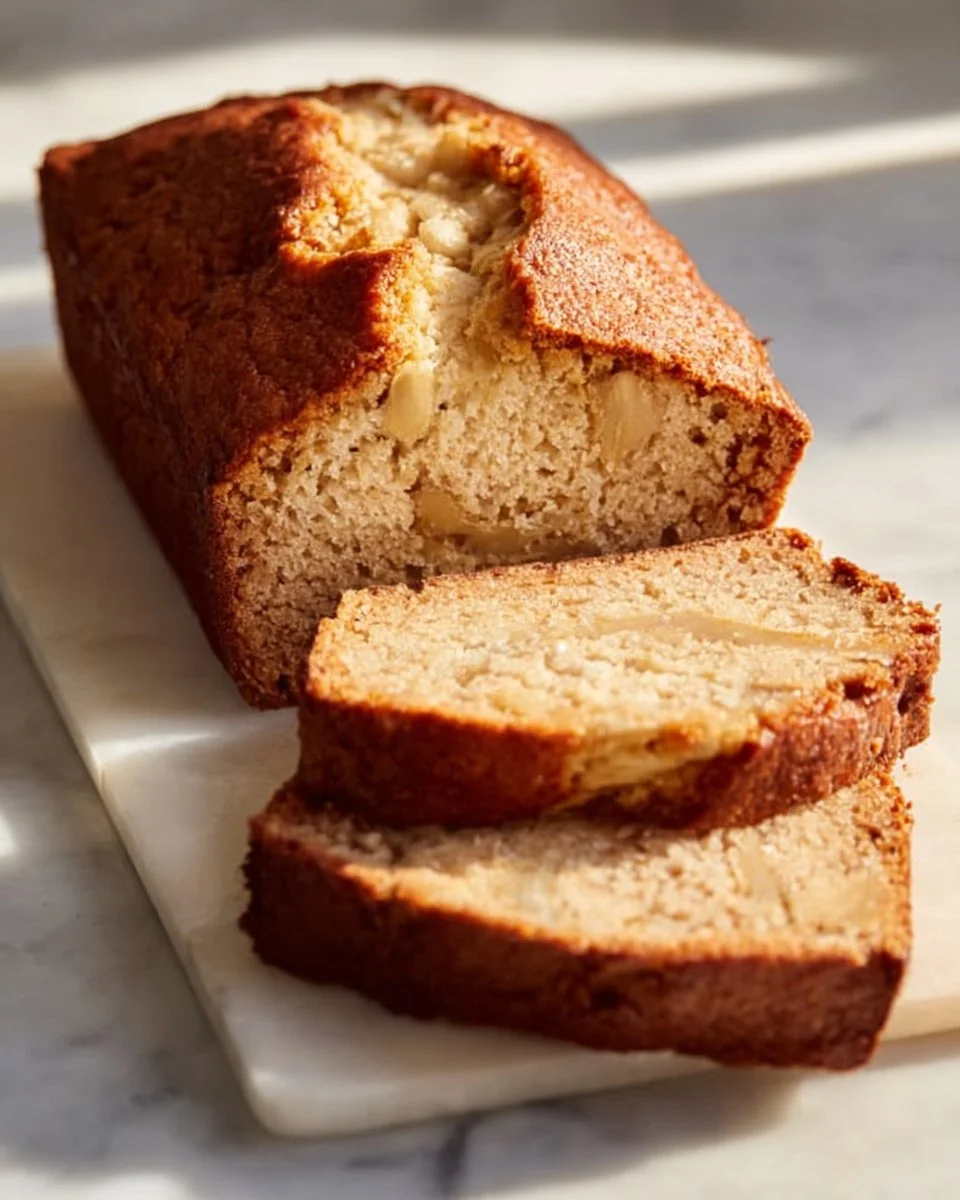
Irresistibly Moist Gluten Free Banana Bread: Your New Favorite Recipe!
There’s something undeniably comforting about the smell of freshly baked bread wafting through the house, and for me, that scent is best embodied in a loaf of Gluten Free Banana Bread. It instantly transports me back to my childhood kitchen, where my mom would bake up a storm on lazy Sunday afternoons. We’d eagerly gather around the counter, waiting for the moment we could finally dig into that golden-brown goodness, warm from the oven, with a smear of butter melting into those sweet, soft slices.
What makes this particular version so special? It’s all about the perfect blend of flavor and texture—moistness from ripe bananas and a delightful nuttiness from almond flour, which gives it a rich taste that satisfies any craving. Plus, it’s a healthier option, using natural sweeteners. You’ve probably tried other versions, but this Gluten Free Banana Bread is a game changer; it’s the ultimate comfort food that fits into a gluten-free lifestyle without skimping on flavor.
In this post, I promise to share not just the recipe, but also my insider tips on how to achieve that bakery-quality loaf right in your own kitchen. Whether you’re a seasoned baker or just starting, you’ll find everything you need to make this delicious treat!
What Are Gluten Free Banana Bread?
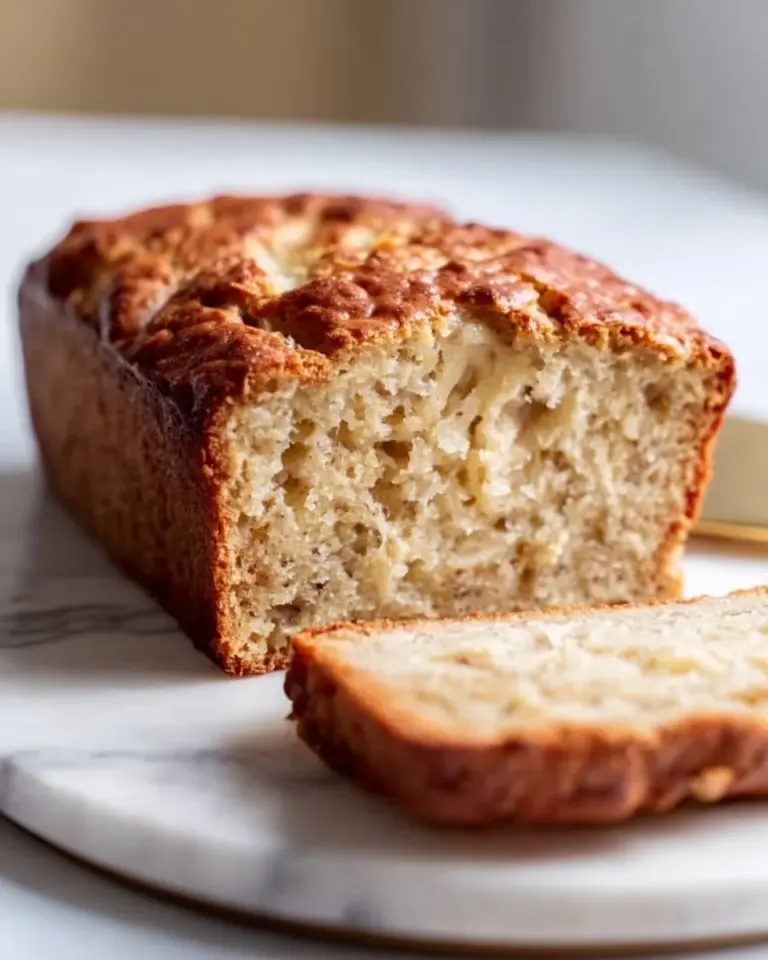
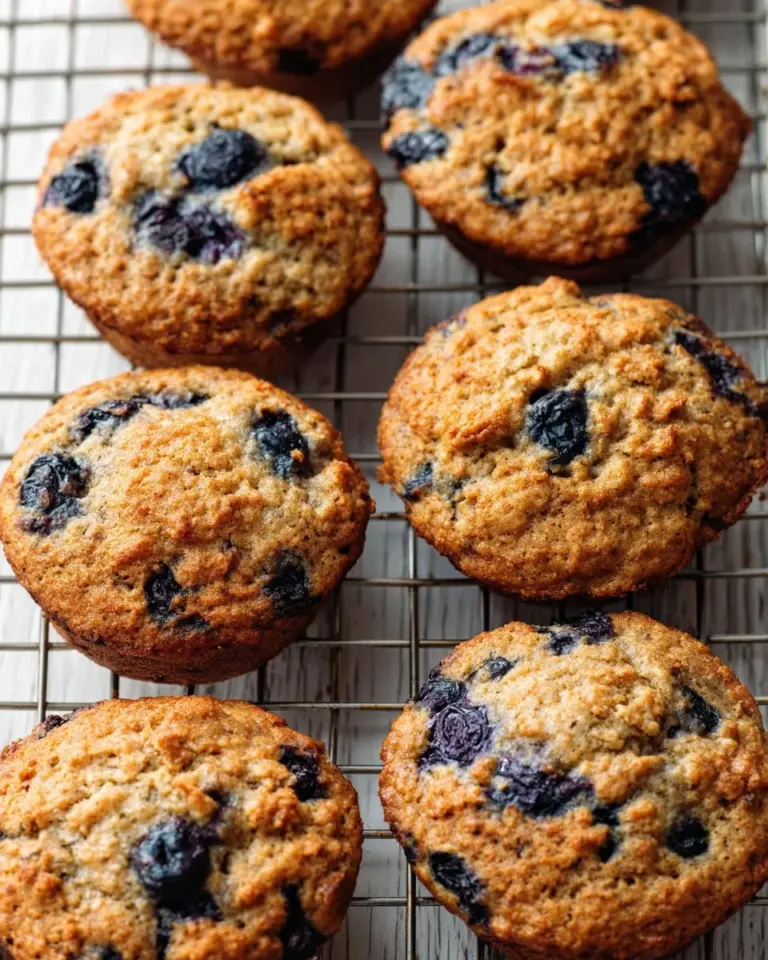
Gluten Free Banana Bread, often considered a star player in the world of breakfast and snacks, has roots deeply embedded in traditional banana bread recipes dating back over a century. This bread is a wonderful fusion of sweet, ripe bananas and wholesome ingredients that come together to create a delightful loaf. The use of almond flour adds a nutty depth, while the mashed bananas provide natural sweetness and moisture that keeps this bread tender and flavorful.
The first bite reveals a soft, moist texture that complements its rich flavor profile beautifully. Unlike its gluten-laden counterparts, this banana bread is light yet satisfying, making it an ideal breakfast or dessert option. It’s perfect for brunches, coffee breaks, or even as an after-dinner treat, especially when served warm with a pat of butter or a drizzle of honey.
If you’ve ever found yourself with overripe bananas sitting on your counter, this is your sign to whip up a loaf of Gluten Free Banana Bread that will not only use those bananas but will also leave everyone raving about your baking skills!
Why You’ll Love This Recipe
Here are just a few reasons why this Gluten Free Banana Bread will quickly become your go-to recipe:
Deliciousness That Rivals Bakeries: Forget store-bought breads that often taste bland and dry. This homemade version is packed with flavor and moisture, and it truly stands out. Everyone who tries this will rave about how good it is!
Wallet-Friendly: Why spend a fortune on gluten-free goodies at specialty shops when you can make this at home for a fraction of the price? The ingredients are simple and cost-effective—especially if you already keep bananas and almond flour on hand.
Customization At Its Best: Whether you want to throw in some chocolate chips, nuts, or dried fruits, this recipe invites you to play. You can easily personalize it to your taste, making every loaf a new adventure.
Easy Preparation: With just a few minutes of active prep time, you’ll be enjoying warm, home-baked goodness in no time! Plus, this recipe is straightforward and easy; even novice bakers will feel confident in mastering it.
Freeze for Later: Want to double your batch? Go ahead! This Gluten Free Banana Bread freezes beautifully, so you can enjoy slices whenever those cravings strike without starting from scratch each time.
With this recipe, you’ll not only learn how to make the best gluten-free banana bread but also add a new family favorite to your baking repertoire.
Ingredients
Here’s everything you’ll need to get started on your Gluten Free Banana Bread:
- 3 ripe bananas: Use very ripe bananas for the best natural sweetness. The browner, the better!
- 2 cups almond flour: This is the star of the show, so opt for high-quality, finely-ground almond flour for a moist crumb. Bob’s Red Mill is a great choice!
- 2 large eggs: Room temperature works best. If you’re in a rush, simply submerge cold eggs in warm water for a few minutes.
- 1/4 cup honey or maple syrup: Both are excellent natural sweeteners, and you can customize based on your taste.
- 1 teaspoon baking soda: Ensures your bread rises beautifully, creating that fluffy texture.
- 1/2 teaspoon salt: Balances the sweetness of the bananas.
- 1 teaspoon vanilla extract: Adds a lovely depth of flavor.
Prep Notes:
- Using Room Temperature Ingredients: Bringing your eggs to room temperature helps them incorporate better into the batter, leading to a lighter loaf.
Step-by-Step Instructions
Preheat the Oven: Start by preheating your oven to 350°F (175°C). Grease a standard loaf pan with a splash of olive oil or line it with parchment paper for easy removal.
Mash the Bananas: In a mixing bowl, mash those ripe bananas until smooth. Don’t be afraid to get a little messy; a fork works wonders here!
Mix Wet Ingredients: Add in the eggs, honey (or maple syrup), and vanilla extract. Give it a good mix until everything is well combined, creating a homogeneous mixture that smells delightful.
Combine Dry Ingredients: In another bowl, whisk together the almond flour, baking soda, and salt. Make sure you break any lumps in the almond flour for an even batter.
Merge Wet and Dry Ingredients: Gradually pour the dry ingredients into the wet mixture. Stir until just combined—be careful not to overmix, as this can lead to a denser bread.
Pour Into Pan: Carefully pour the batter into your prepared loaf pan, smoothing it out with a spatula if needed.
Bake: Place the pan in your preheated oven and bake for 45-55 minutes. You’ll know it’s done when a toothpick inserted into the center comes out clean or with just a few crumbs. The top should be golden and slightly domed.
Cool: Let your loaf cool in the pan for about 10 minutes, then gently transfer it to a wire rack to cool completely. Patience is key—the flavors develop beautifully as it cools!
Chef’s Tips:
- For an extra light loaf, consider folding in some beaten egg whites after you’ve combined your wet and dry ingredients.
- Common mistakes to avoid include over-mixing the batter—remember, just mix until combined!
Expert Tips & Tricks
Storage: Keep your leftover Gluten Free Banana Bread in an airtight container at room temperature for up to 3 days. For longer shelf life, store in the fridge for up to a week.
Freezing: Wrap slices tightly in plastic wrap and place them in a freezer-safe bag to keep them fresh for up to 3 months. Thaw on the counter for a delicious treat whenever you need it.
Make-Ahead: You can prepare the batter a day in advance—just keep it tightly covered in the fridge and bake it fresh the next day!
Troubleshooting: If your bread sinks in the middle, this is often due to too much moisture (overly ripe bananas) or underbaking. Be sure to check for doneness with a toothpick!
Flavor Enhancements: Spice it up with ground cinnamon or nutmeg for added warmth, or mix in nuts or chocolate chips for a delightful crunch!
Serving Suggestions
This Gluten Free Banana Bread shines on its own, but serving it with a dollop of Greek yogurt or a smear of almond butter elevates the experience even further. Consider adding fresh berries or slices of citrus for a bright side dish. Perfect for brunch gatherings or cozy family breakfasts, this loaf can also be enjoyed as a late-night snack with a warm cup of herbal tea!
Variations & Substitutions
- Chocolate Chip Banana Bread: Fold in a cup of chocolate chips for a decadent treat. (Dairy-free chips also work great!)
- Nutty Banana Bread: Toss in 1/2 cup of walnuts or pecans for a crunchy element.
- Seasonal Flavors: In autumn, consider adding pumpkin puree or some chopped apples with cinnamon for a fall twist. During the holiday season, crushed cranberries add a beautiful tart balance.
Adapt this recipe to suit any dietary need, whether it’s nut-free or adding protein powder to make it a post-workout snack!
Nutrition & Storage Info
- Prep Time: 10 minutes
- Cook Time: 45-55 minutes
- Total Time: 1 hour
- Yield: 1 loaf (approximately 10 slices)
- Estimated Calories: 180 calories per slice
Storage: This Gluten Free Banana Bread is best enjoyed fresh but lasts for 3 days at room temperature. Store in the fridge for a week or freeze for up to 3 months.
FAQ Section
Can I use another flour instead of almond flour?
- While almond flour is a great base, you can try gluten-free all-purpose flour. Just ensure it contains xanthan gum for binding!
What if my bananas aren’t ripe enough?
- If your bananas are still somewhat yellow, speed up the ripening process by placing them in a brown paper bag overnight.
Can I reduce the sugar?
- You can definitely reduce the honey or maple syrup by a couple of tablespoons, but the sweetness may be slightly less. Alternatively, add spices like cinnamon to enhance flavor.
What is the best way to mash bananas?
- A fork works well, but if you want it super smooth, a potato masher or even a food processor can do the trick!
Can I make it vegan?
- Yes! Substitute the eggs with flaxseed eggs (1 tablespoon of flaxseed meal mixed with 2.5 tablespoons of water per egg) and be sure to use maple syrup.
Is this banana bread gluten-free and dairy-free?
- Yes, it’s both! Just check the ingredients on your almond flour and add-ins to ensure they meet your dietary needs.
What do I do if my batter is too dry?
- If it seems too dry, add a tablespoon of water or an additional mashed banana until it reaches the right consistency.
How do I know when it’s done baking?
- A toothpick inserted into the center should come out clean or with just a few crumbs, indicating your loaf is done!
Can I add protein powder to the mixture?
- Absolutely! If you do, you may need to add a touch extra moisture to maintain the loaf’s moisture.
How do I make mini loaves?
- Divide the batter into mini loaf pans and reduce the baking time to about 30-35 minutes.
Conclusion
This Gluten Free Banana Bread is special because it not only honors the cherished memories I have of baking with my family, but it also creates new ones for you and your loved ones in your kitchen. I truly hope you get to try this recipe and experience the smiles and nostalgia it brings, just like it did for me.
I’d love to hear your thoughts, any tweaks you made, or questions you might have! Don’t forget to check out other delicious recipes on my blog that will bring comfort and joy to your table. Happy baking, friends!